07.24.26 - Repairing the mask mesh
If you haven't already, I would first read my portfolio post on Sphynx V1. I discuss the process of creating the mask for Neotropolis 2226, as well as other elements of the costume.
I created the mask by importing a papercraft model into Fusion, extracting the polygons into their own components, and folding them together. While I was able to derive a completed mask, it had a few defects:
- Some of the seams in the mesh had gaps since the polygons were slightly imperfect
- The mask's surface contained "bulging" defects in areas of greater shell thickness
- Other mask features came out as malformed
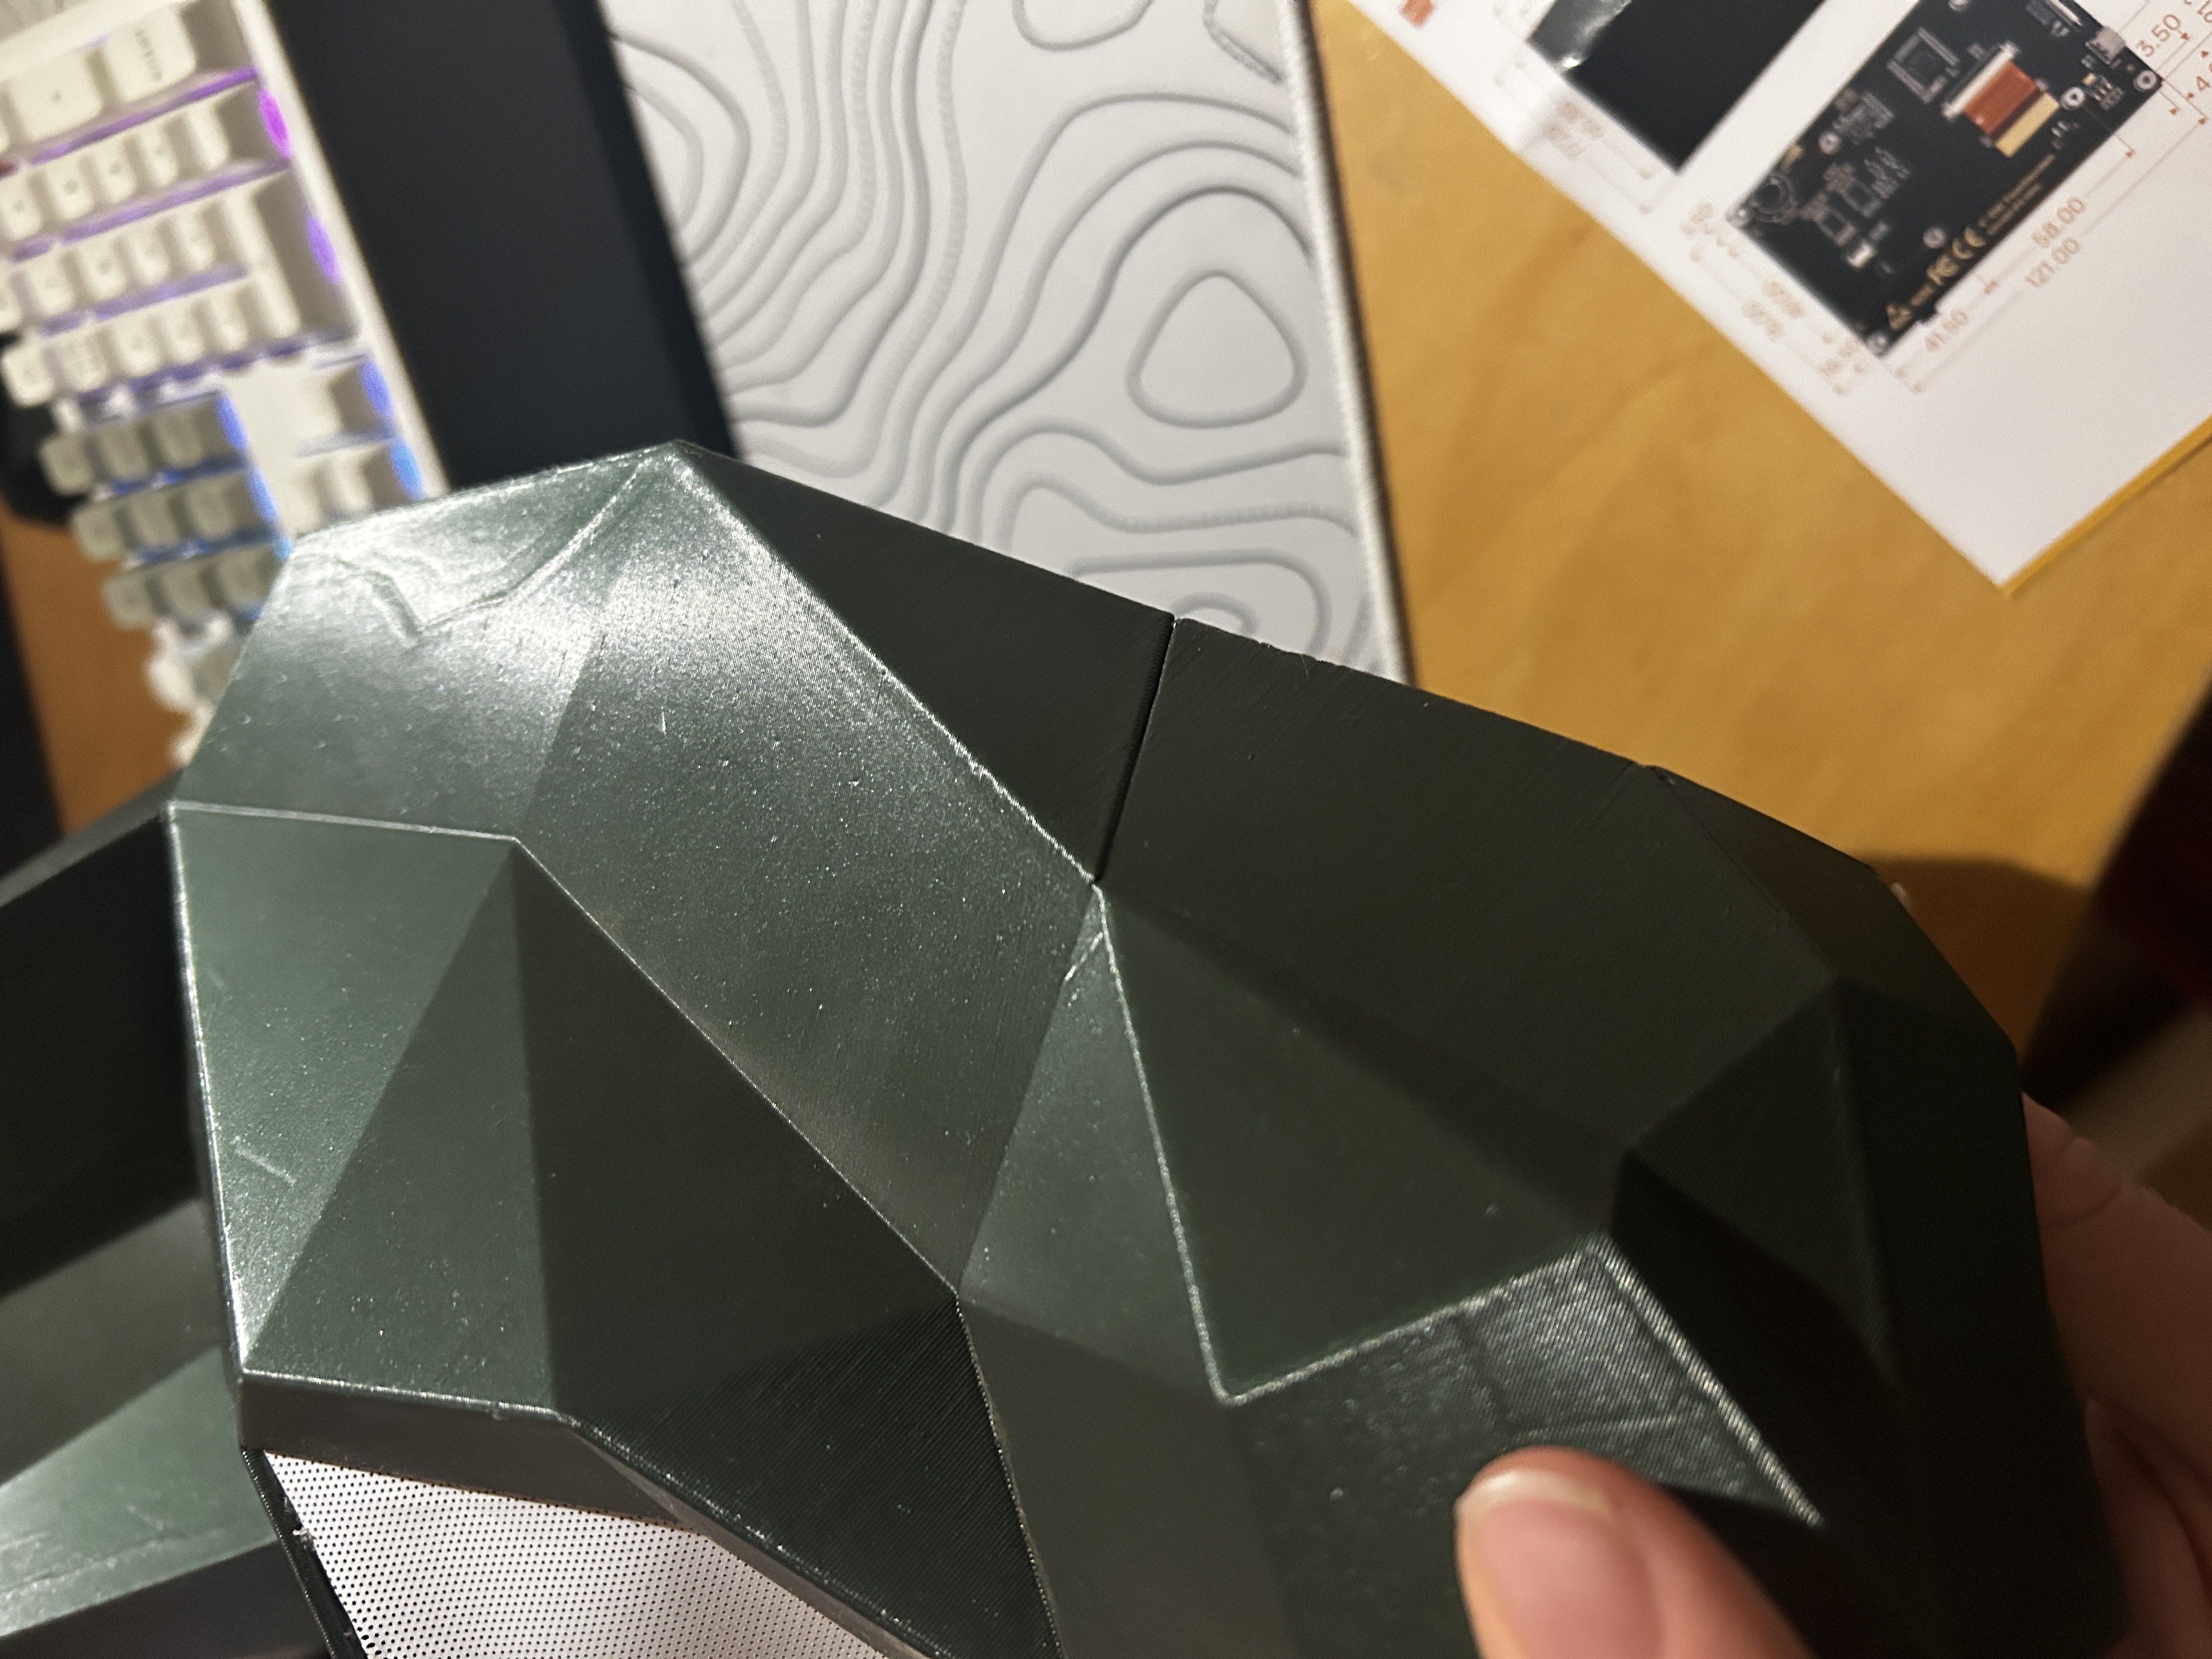
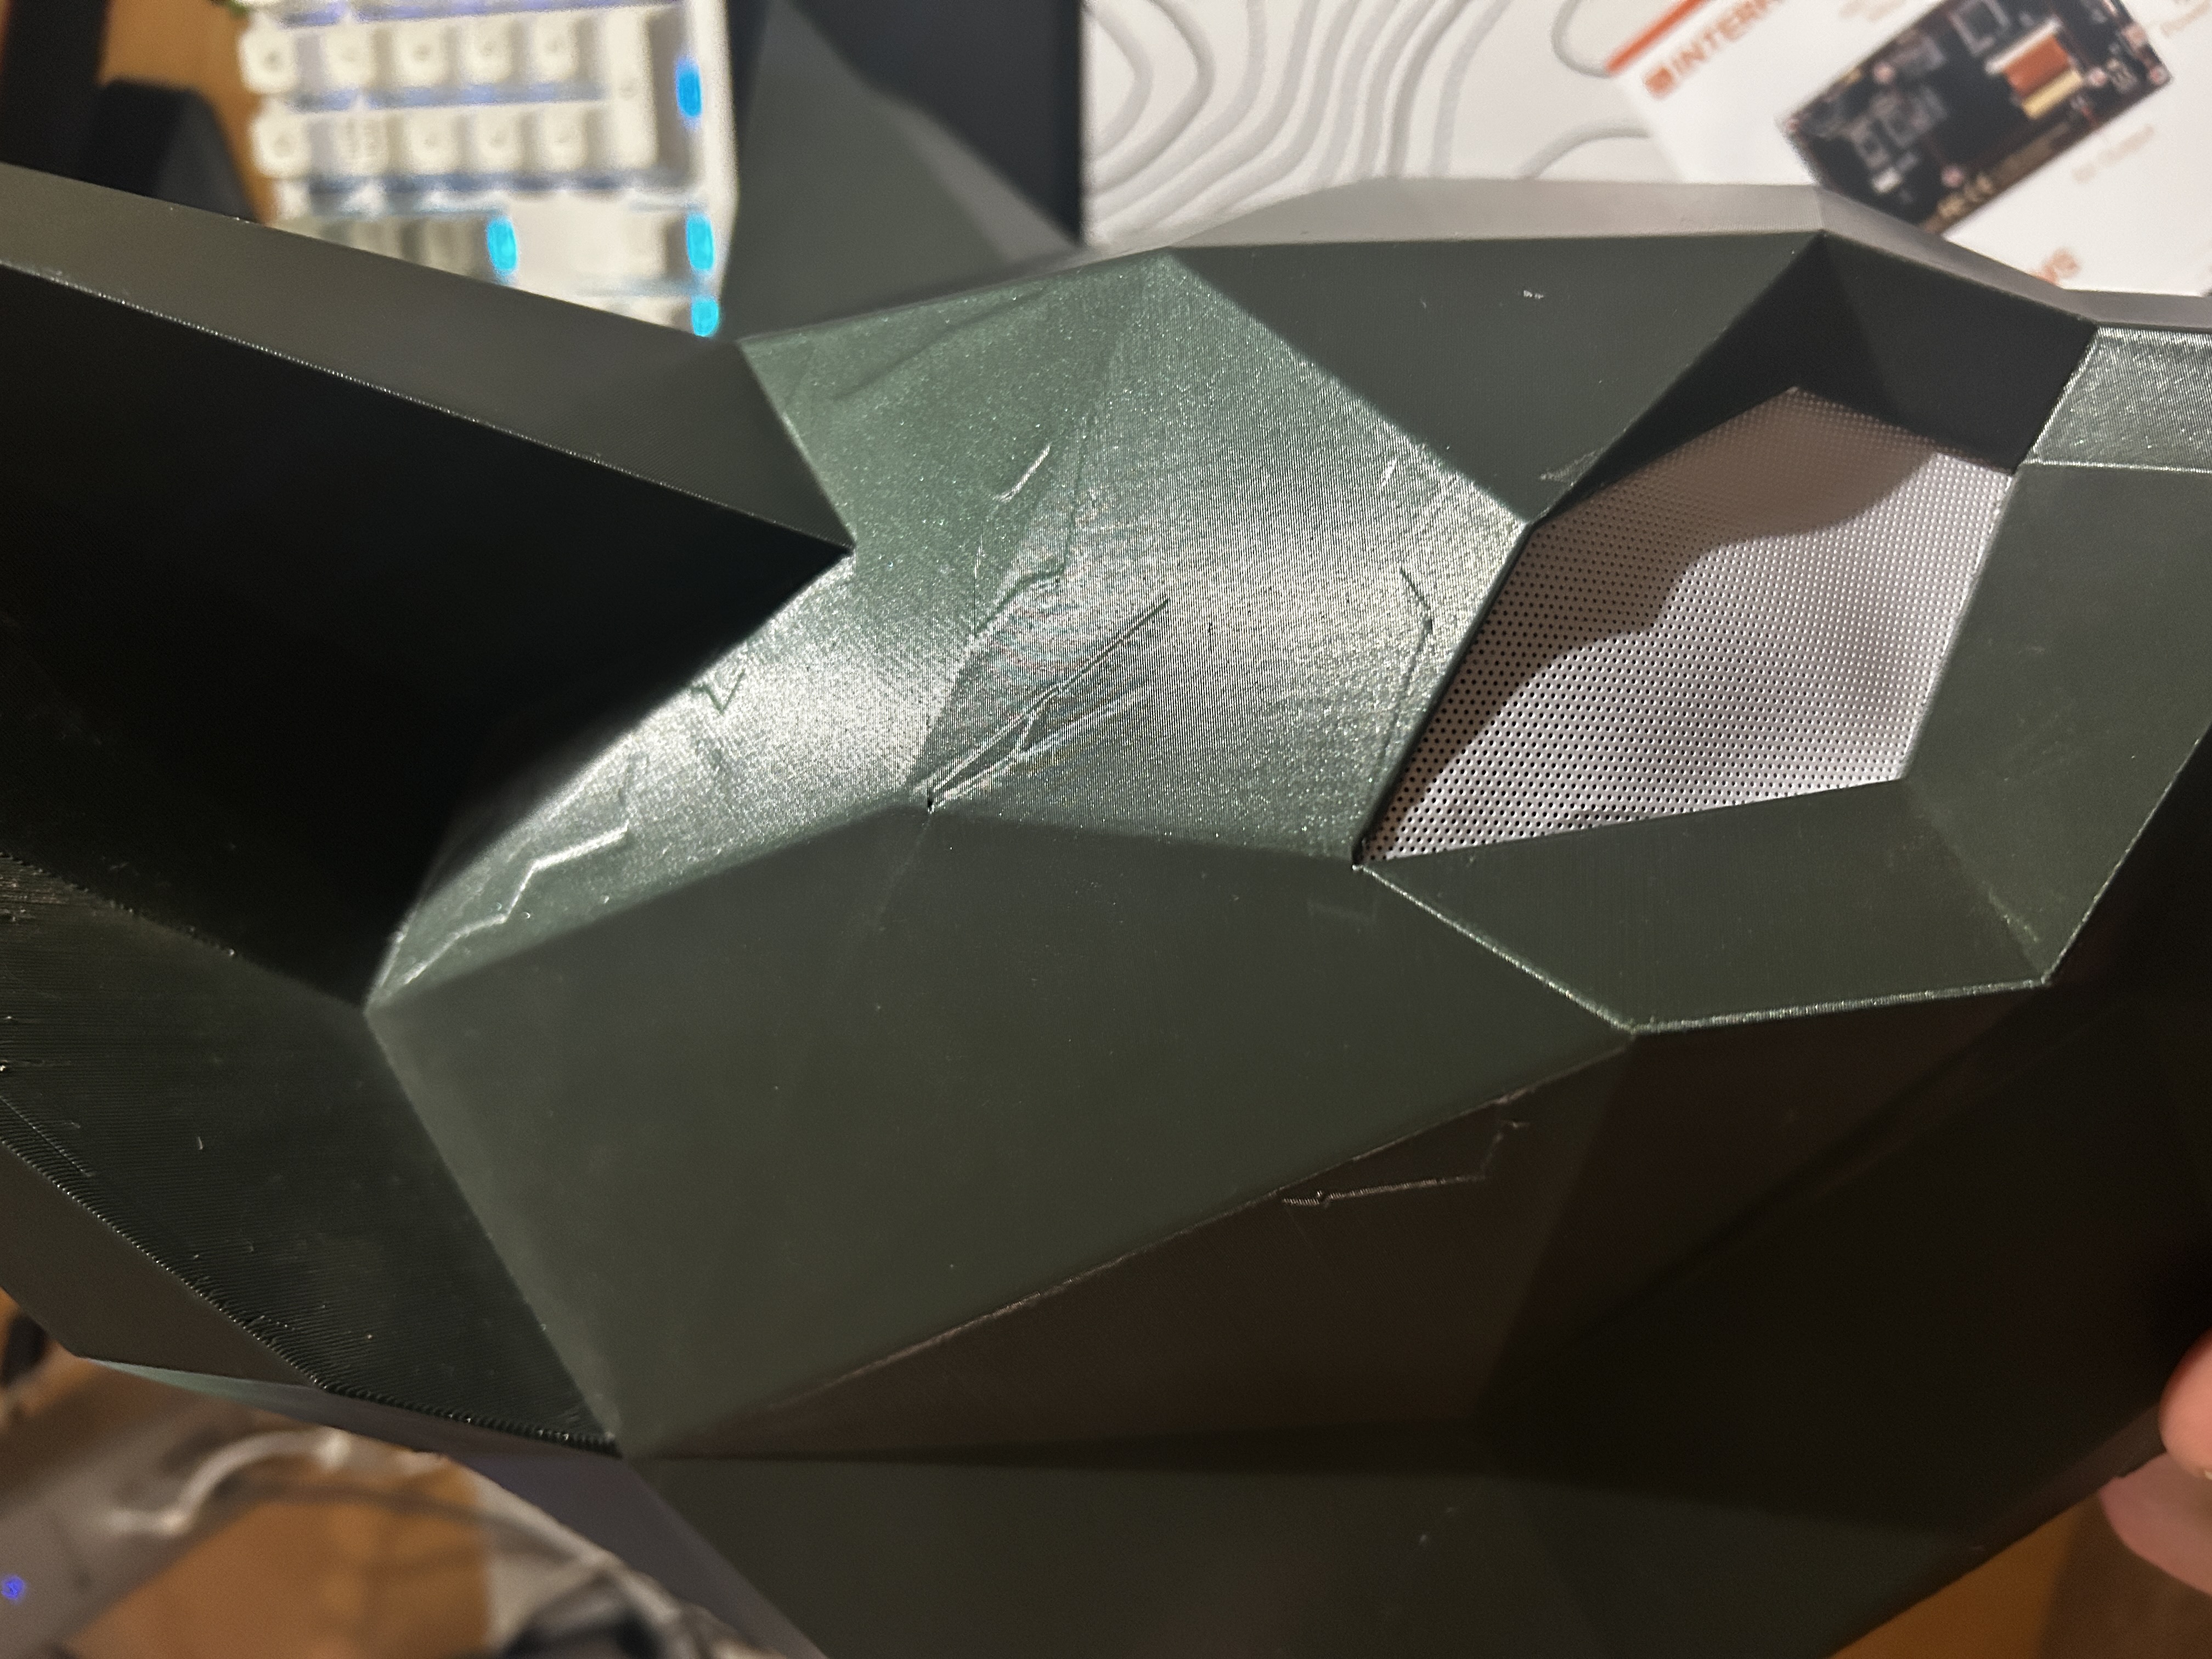
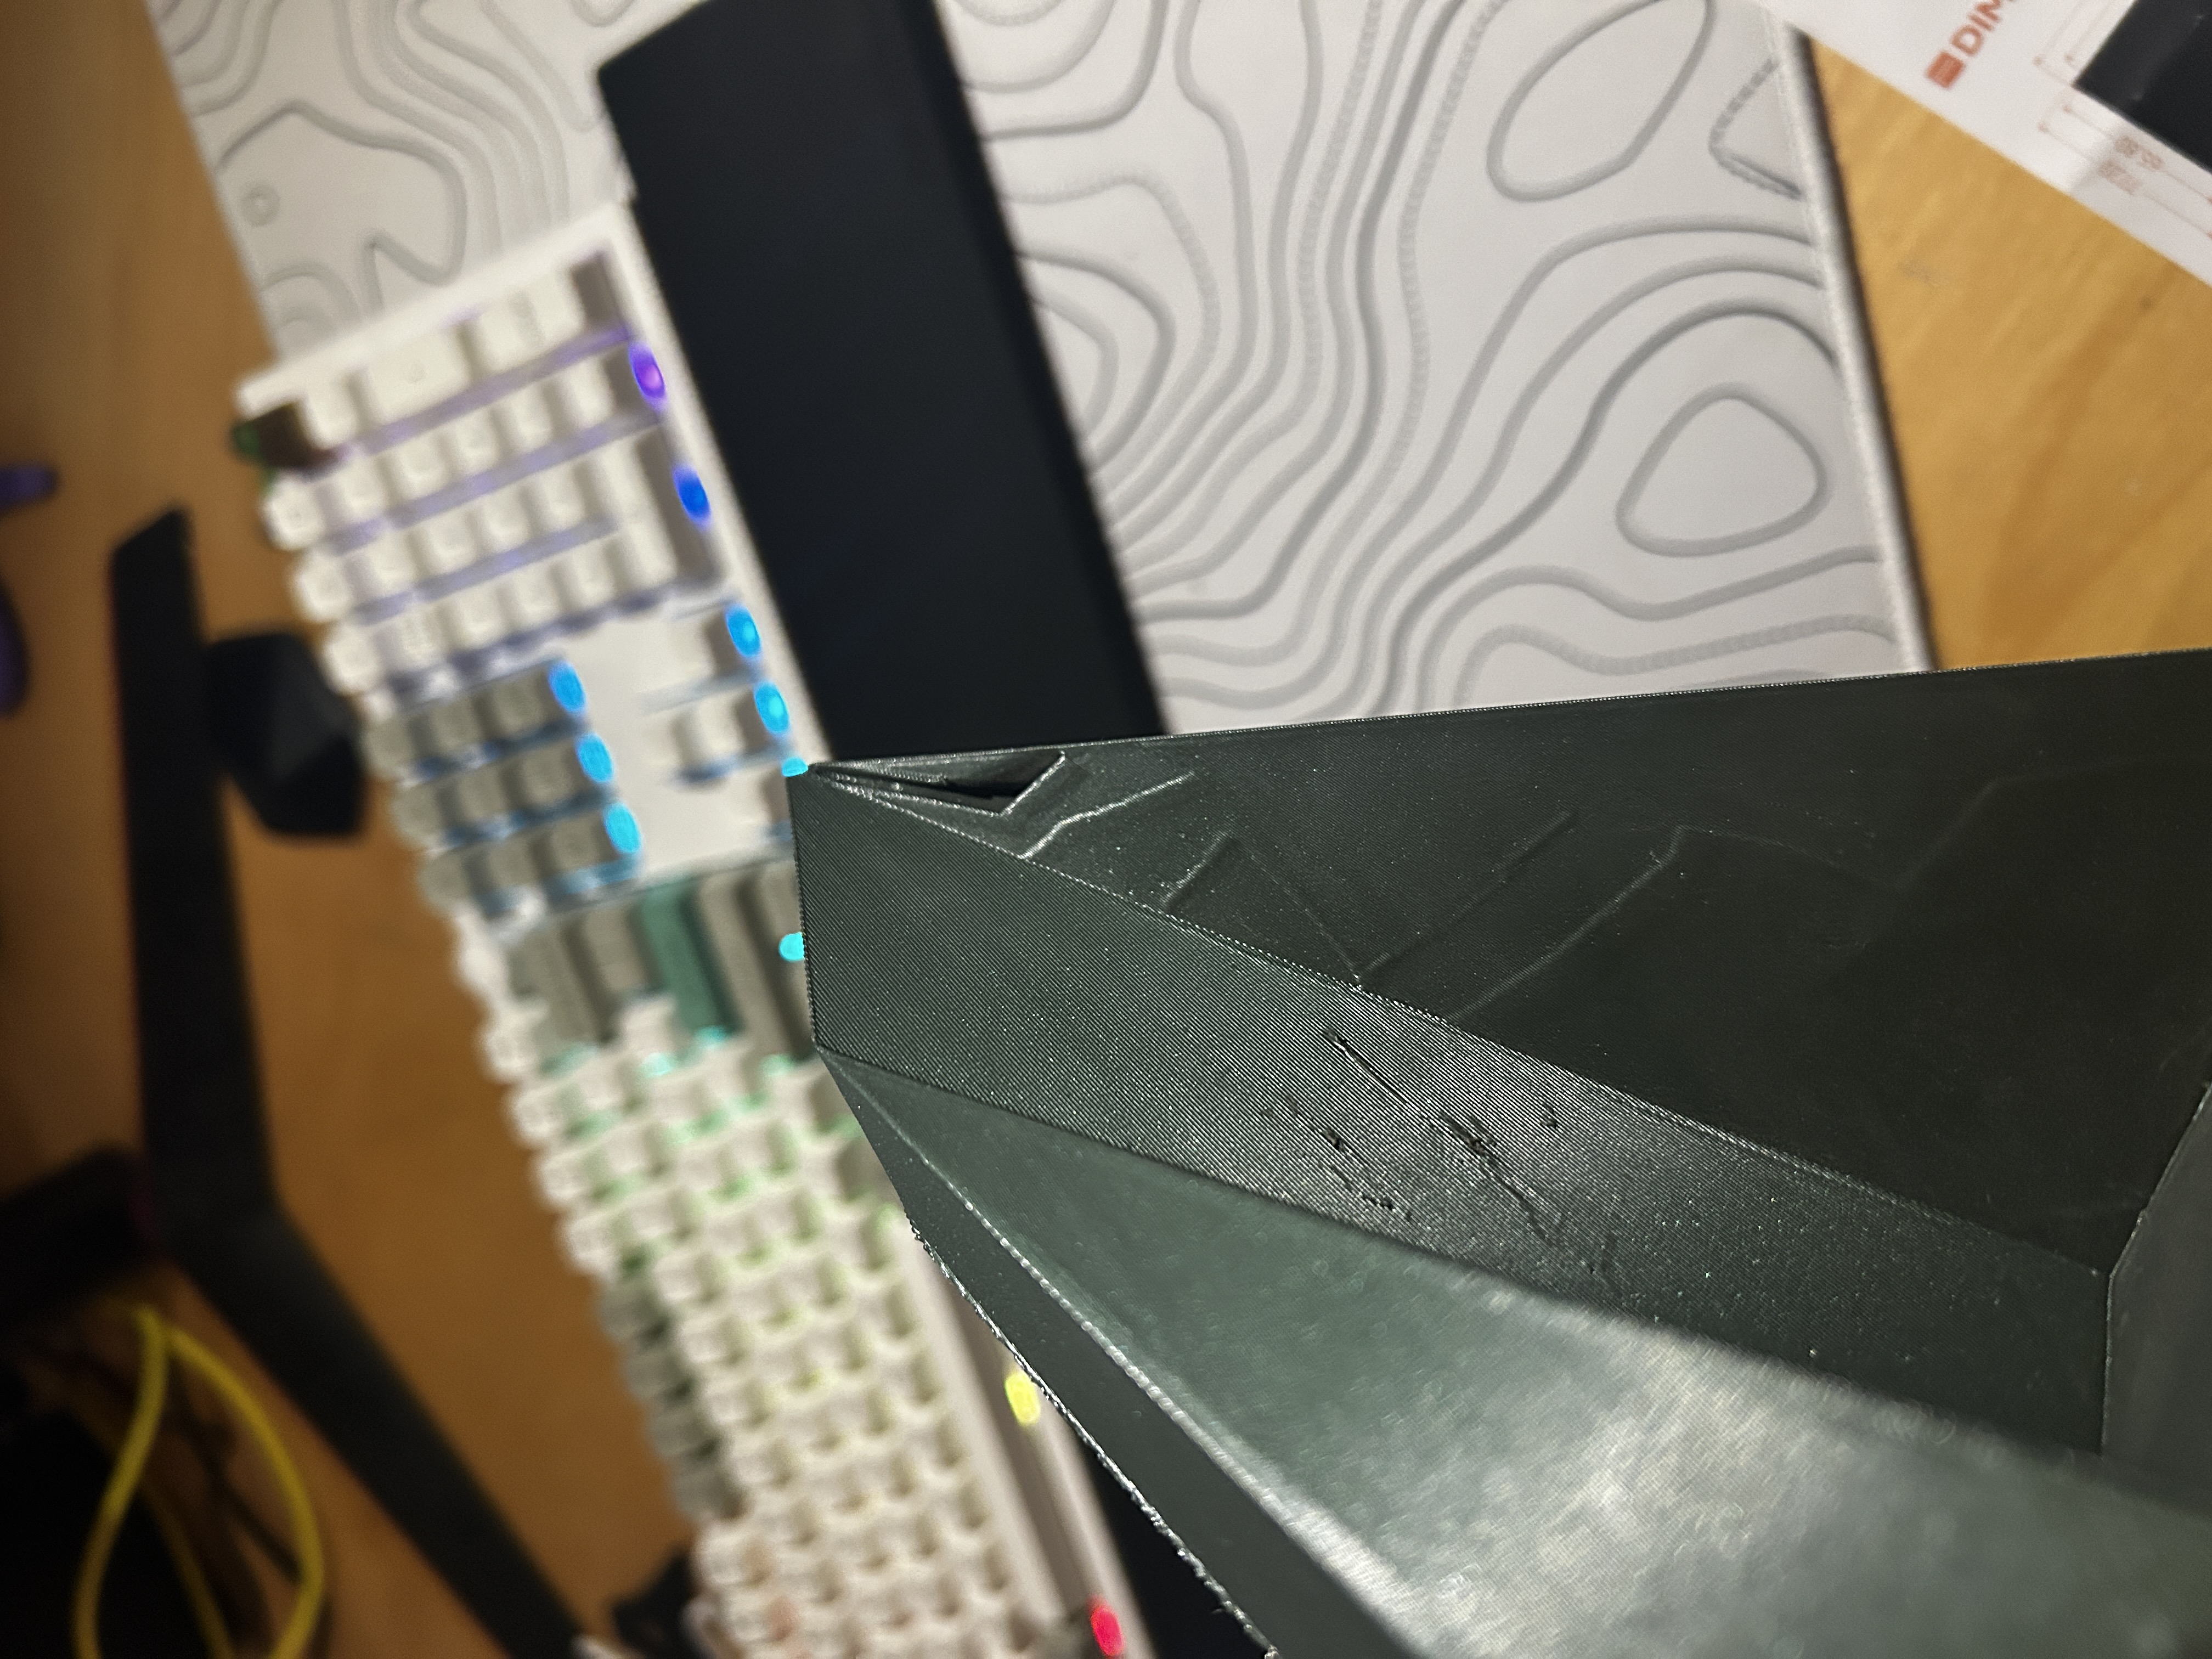
Most of the abnormalities can be attributed to the questionable tooling I used to create it. The mask mesh was rather complicated, and many of Fusion's native tools became unusable. Thus, I needed to implement a few work-around solutions to get the results that I wanted. Again, I only had two weeks to pull my costuming together; mask quality wasn't necessarily on the top of my priority list.
While I was at Neotropolis, I had a bit of an epiphany: if I could define my own point cloud of vertices, using the imperfect mesh as a reference, and then use the 3d sketch tool to connect those vertices together, I could create a perfected mesh of new polygons. Then, I could derive the polygons into their own surfaces and stitch them together. Since this mesh would be much simpler than the first version, I could use Fusion's native surface tools to derive a shell with uniform thickness, and thus, no imperfections. No seam gaps, no bulging, nothing.
I finally got around to testing my theory, and I was very pleased with the results.
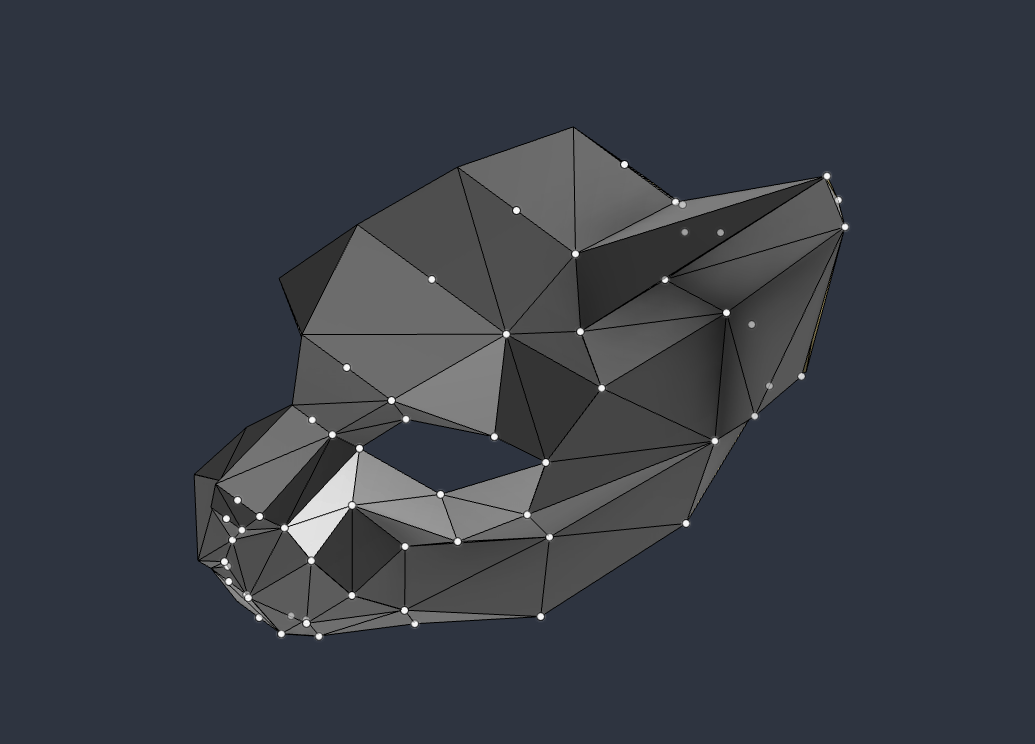
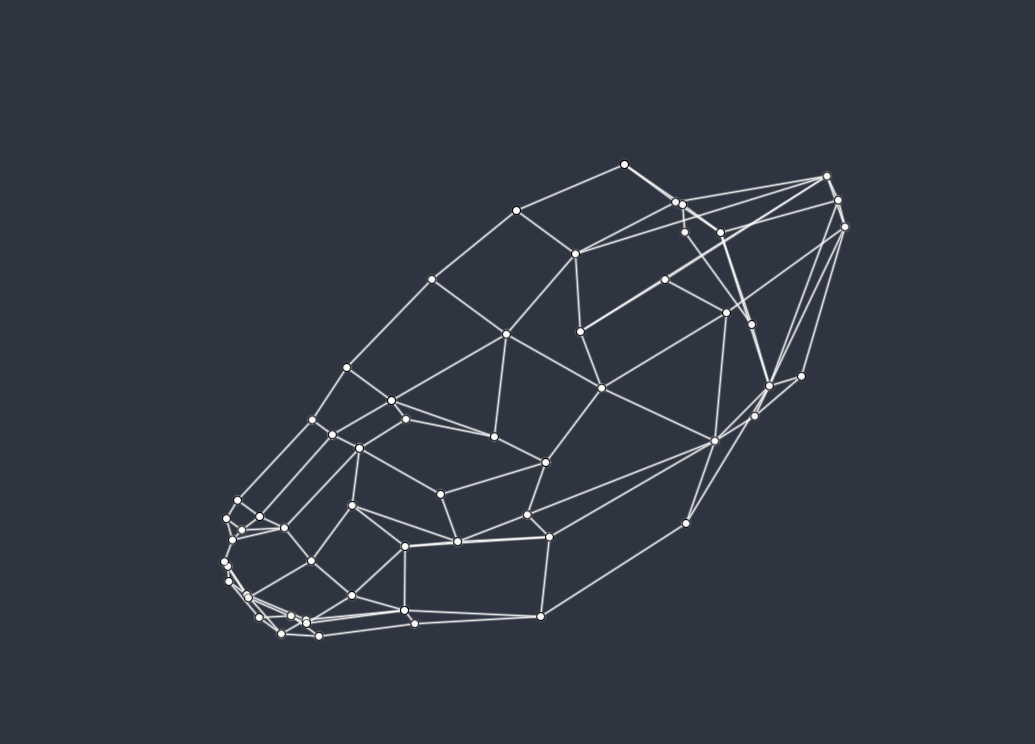
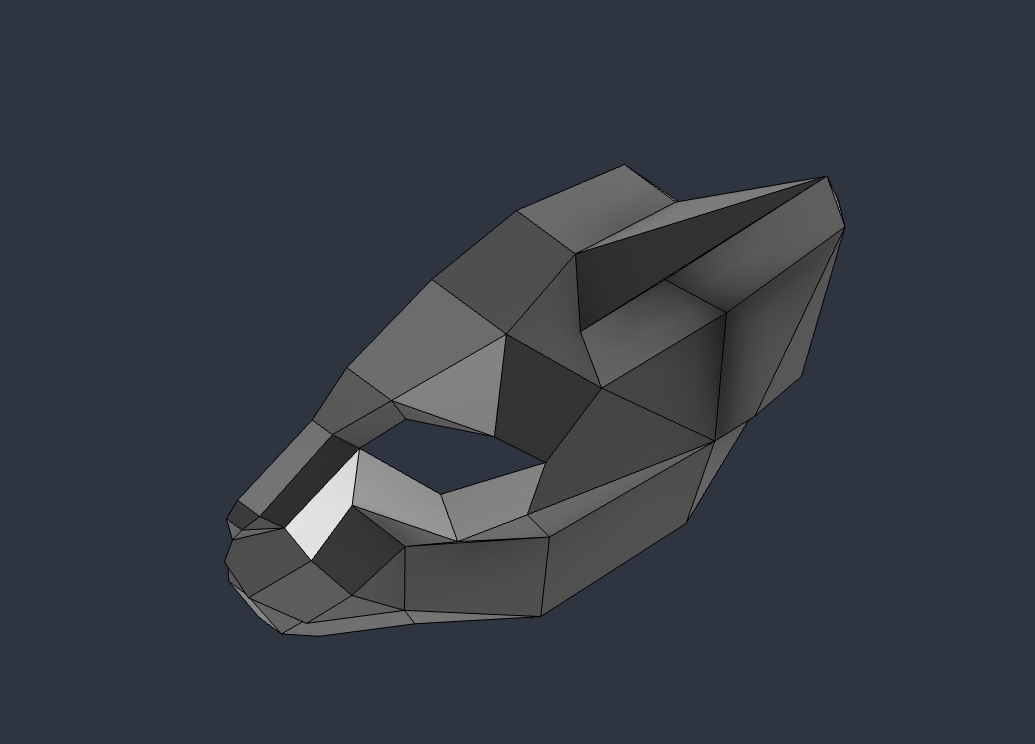
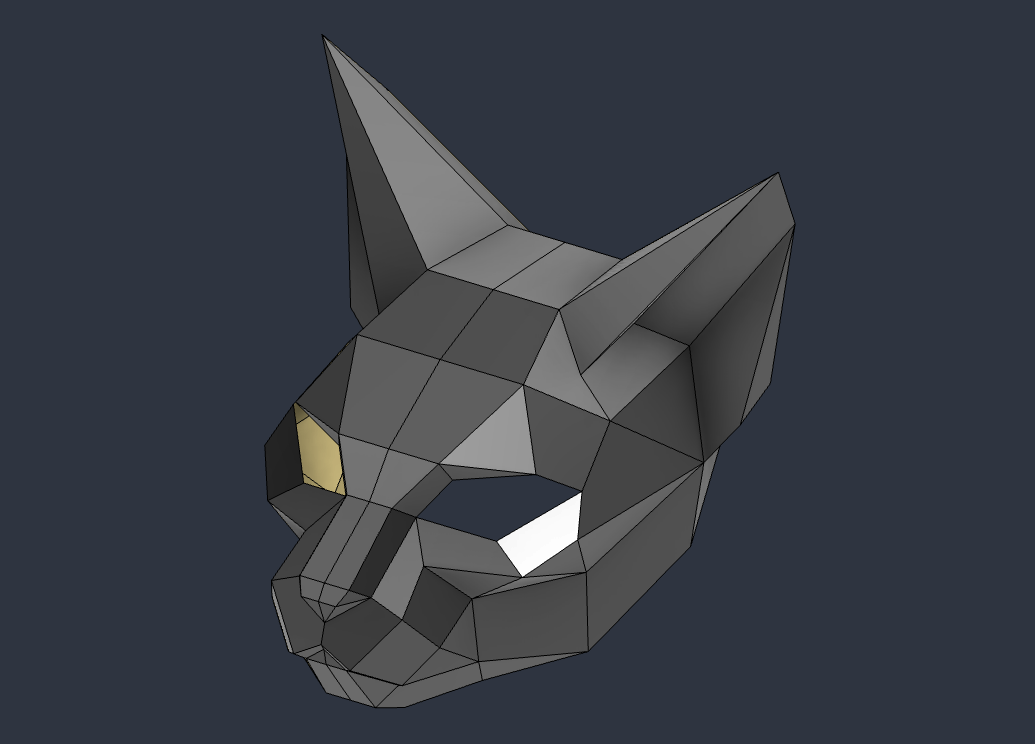
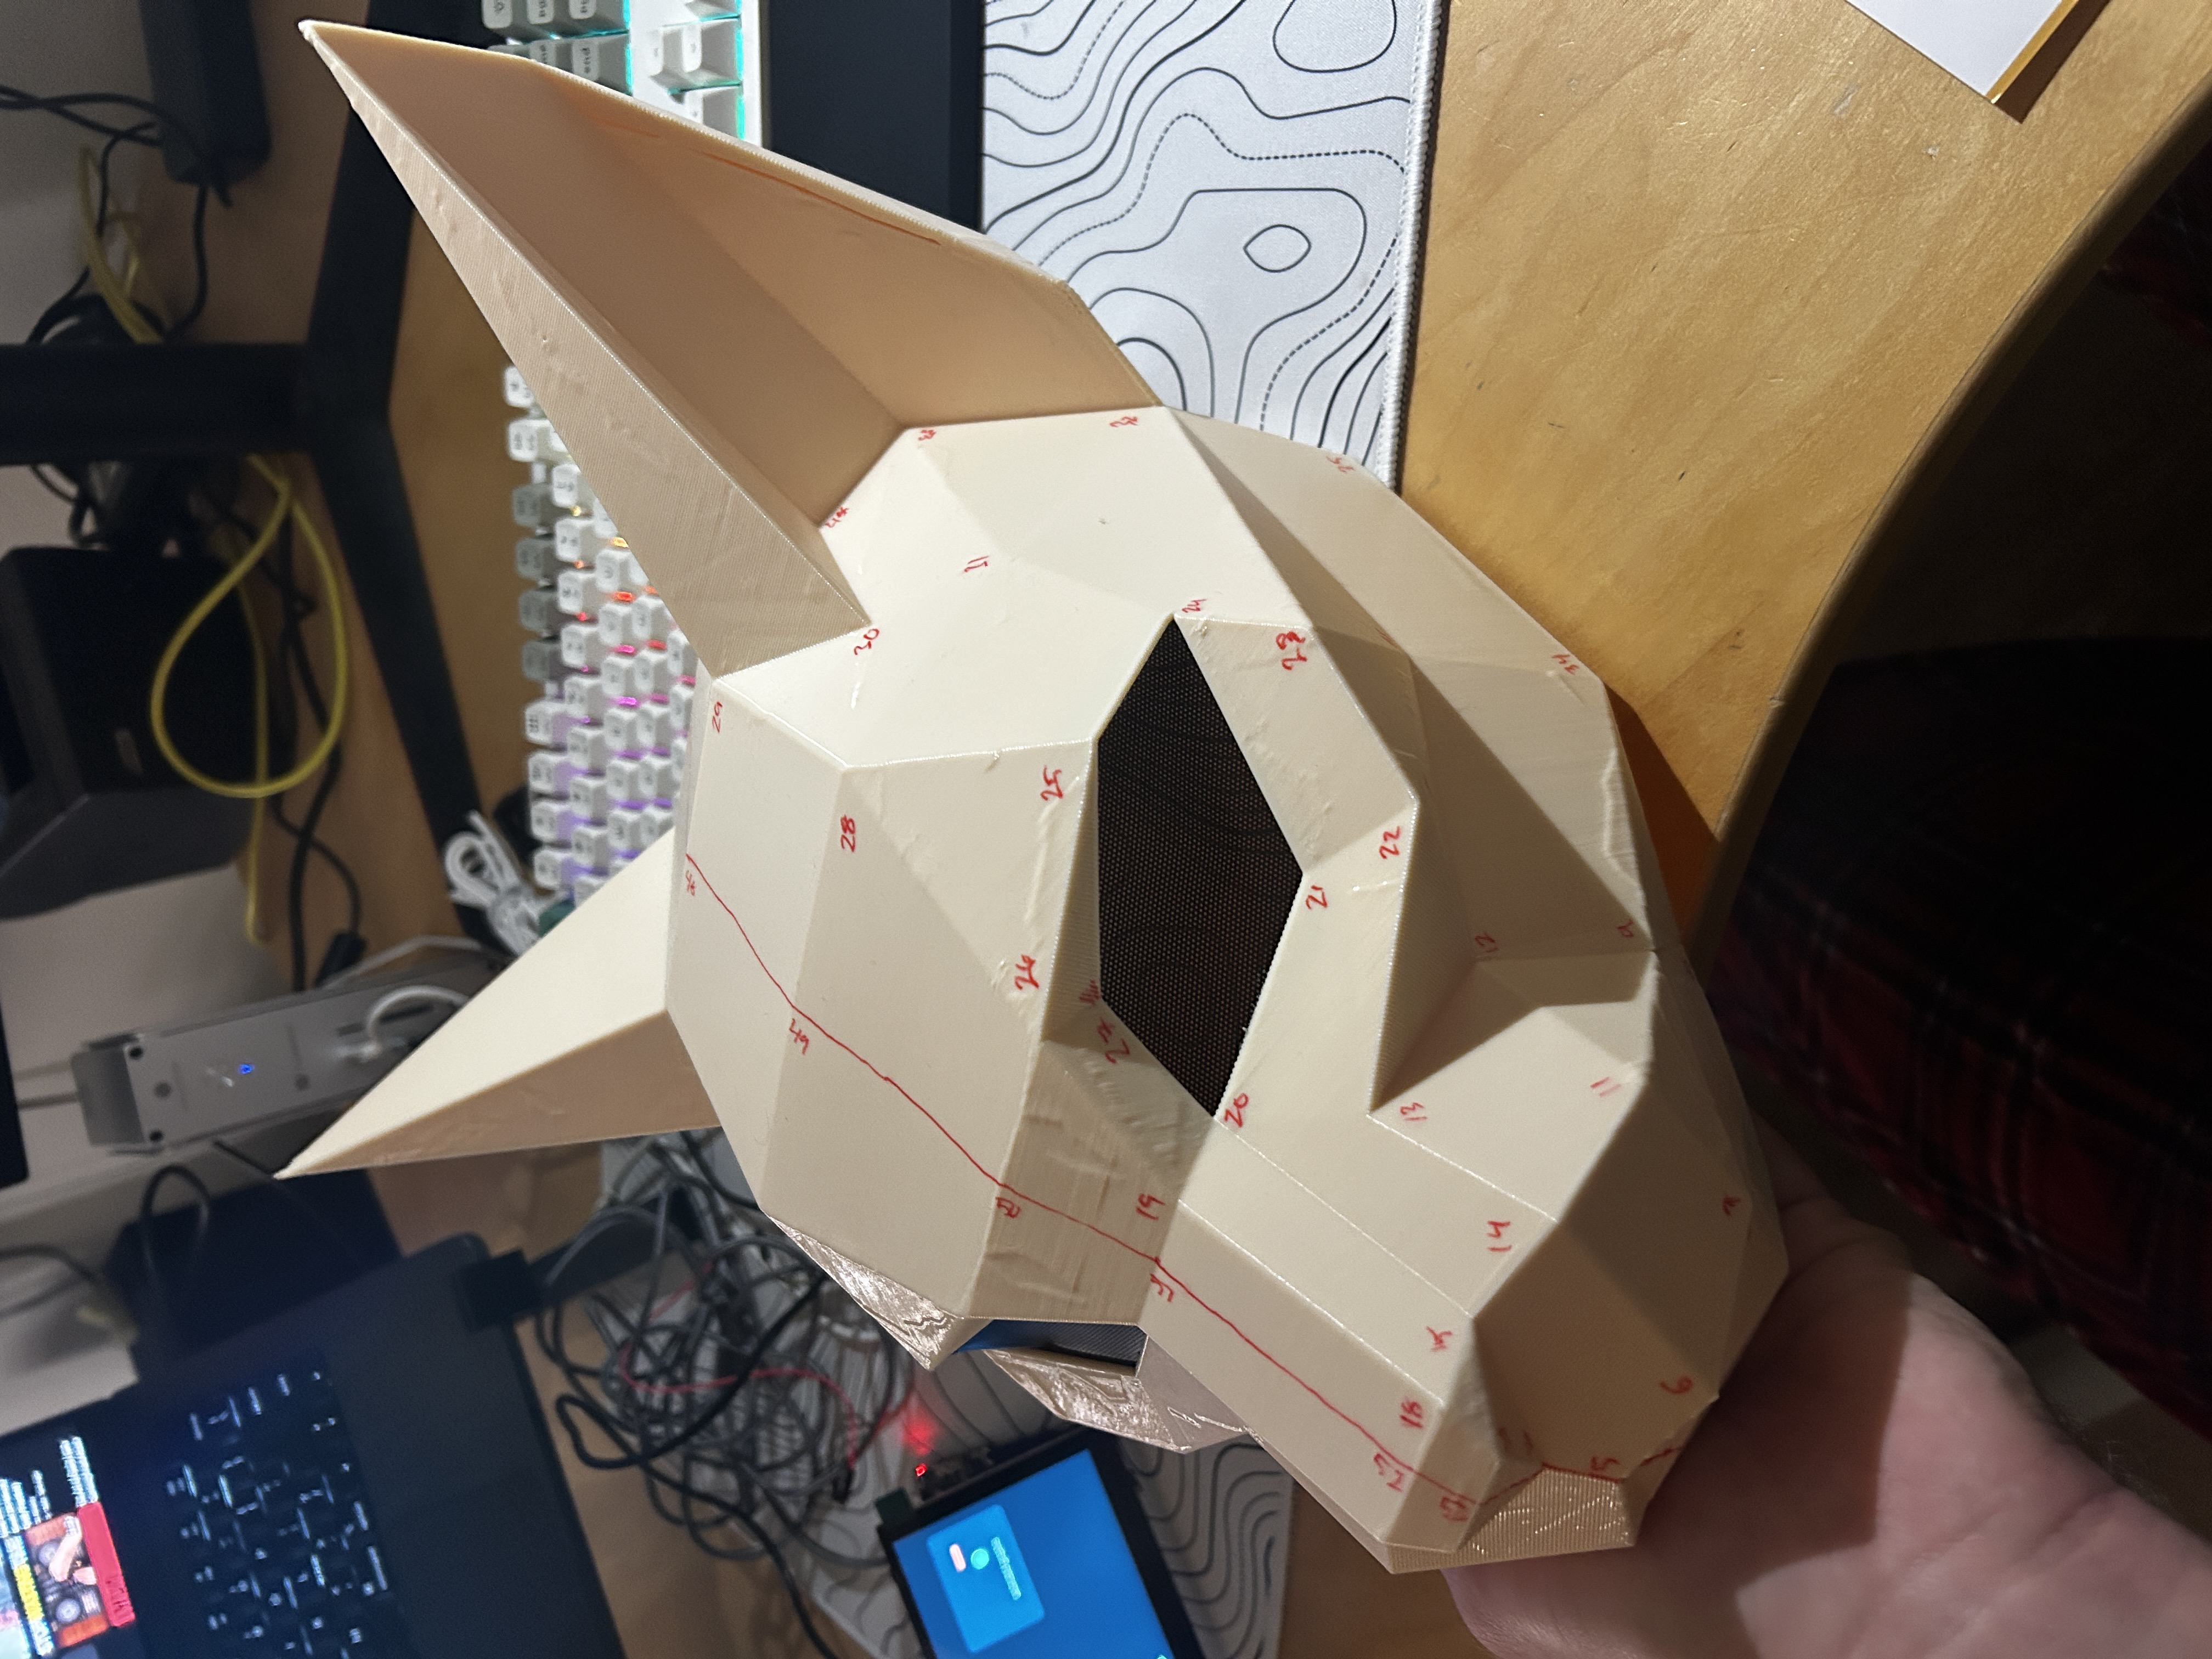
During the sketching process, I used a test mask from Sphynx V1 to label each vertex and make sure all of them were accounted for. This also made it easier to connect them together while using the 3d sketch tool.
Now that I had a simpler mesh, I could use Fusion's surface tools to add thickness with ease. I created a mask version and a solid version of the mesh and sent them to my printer.
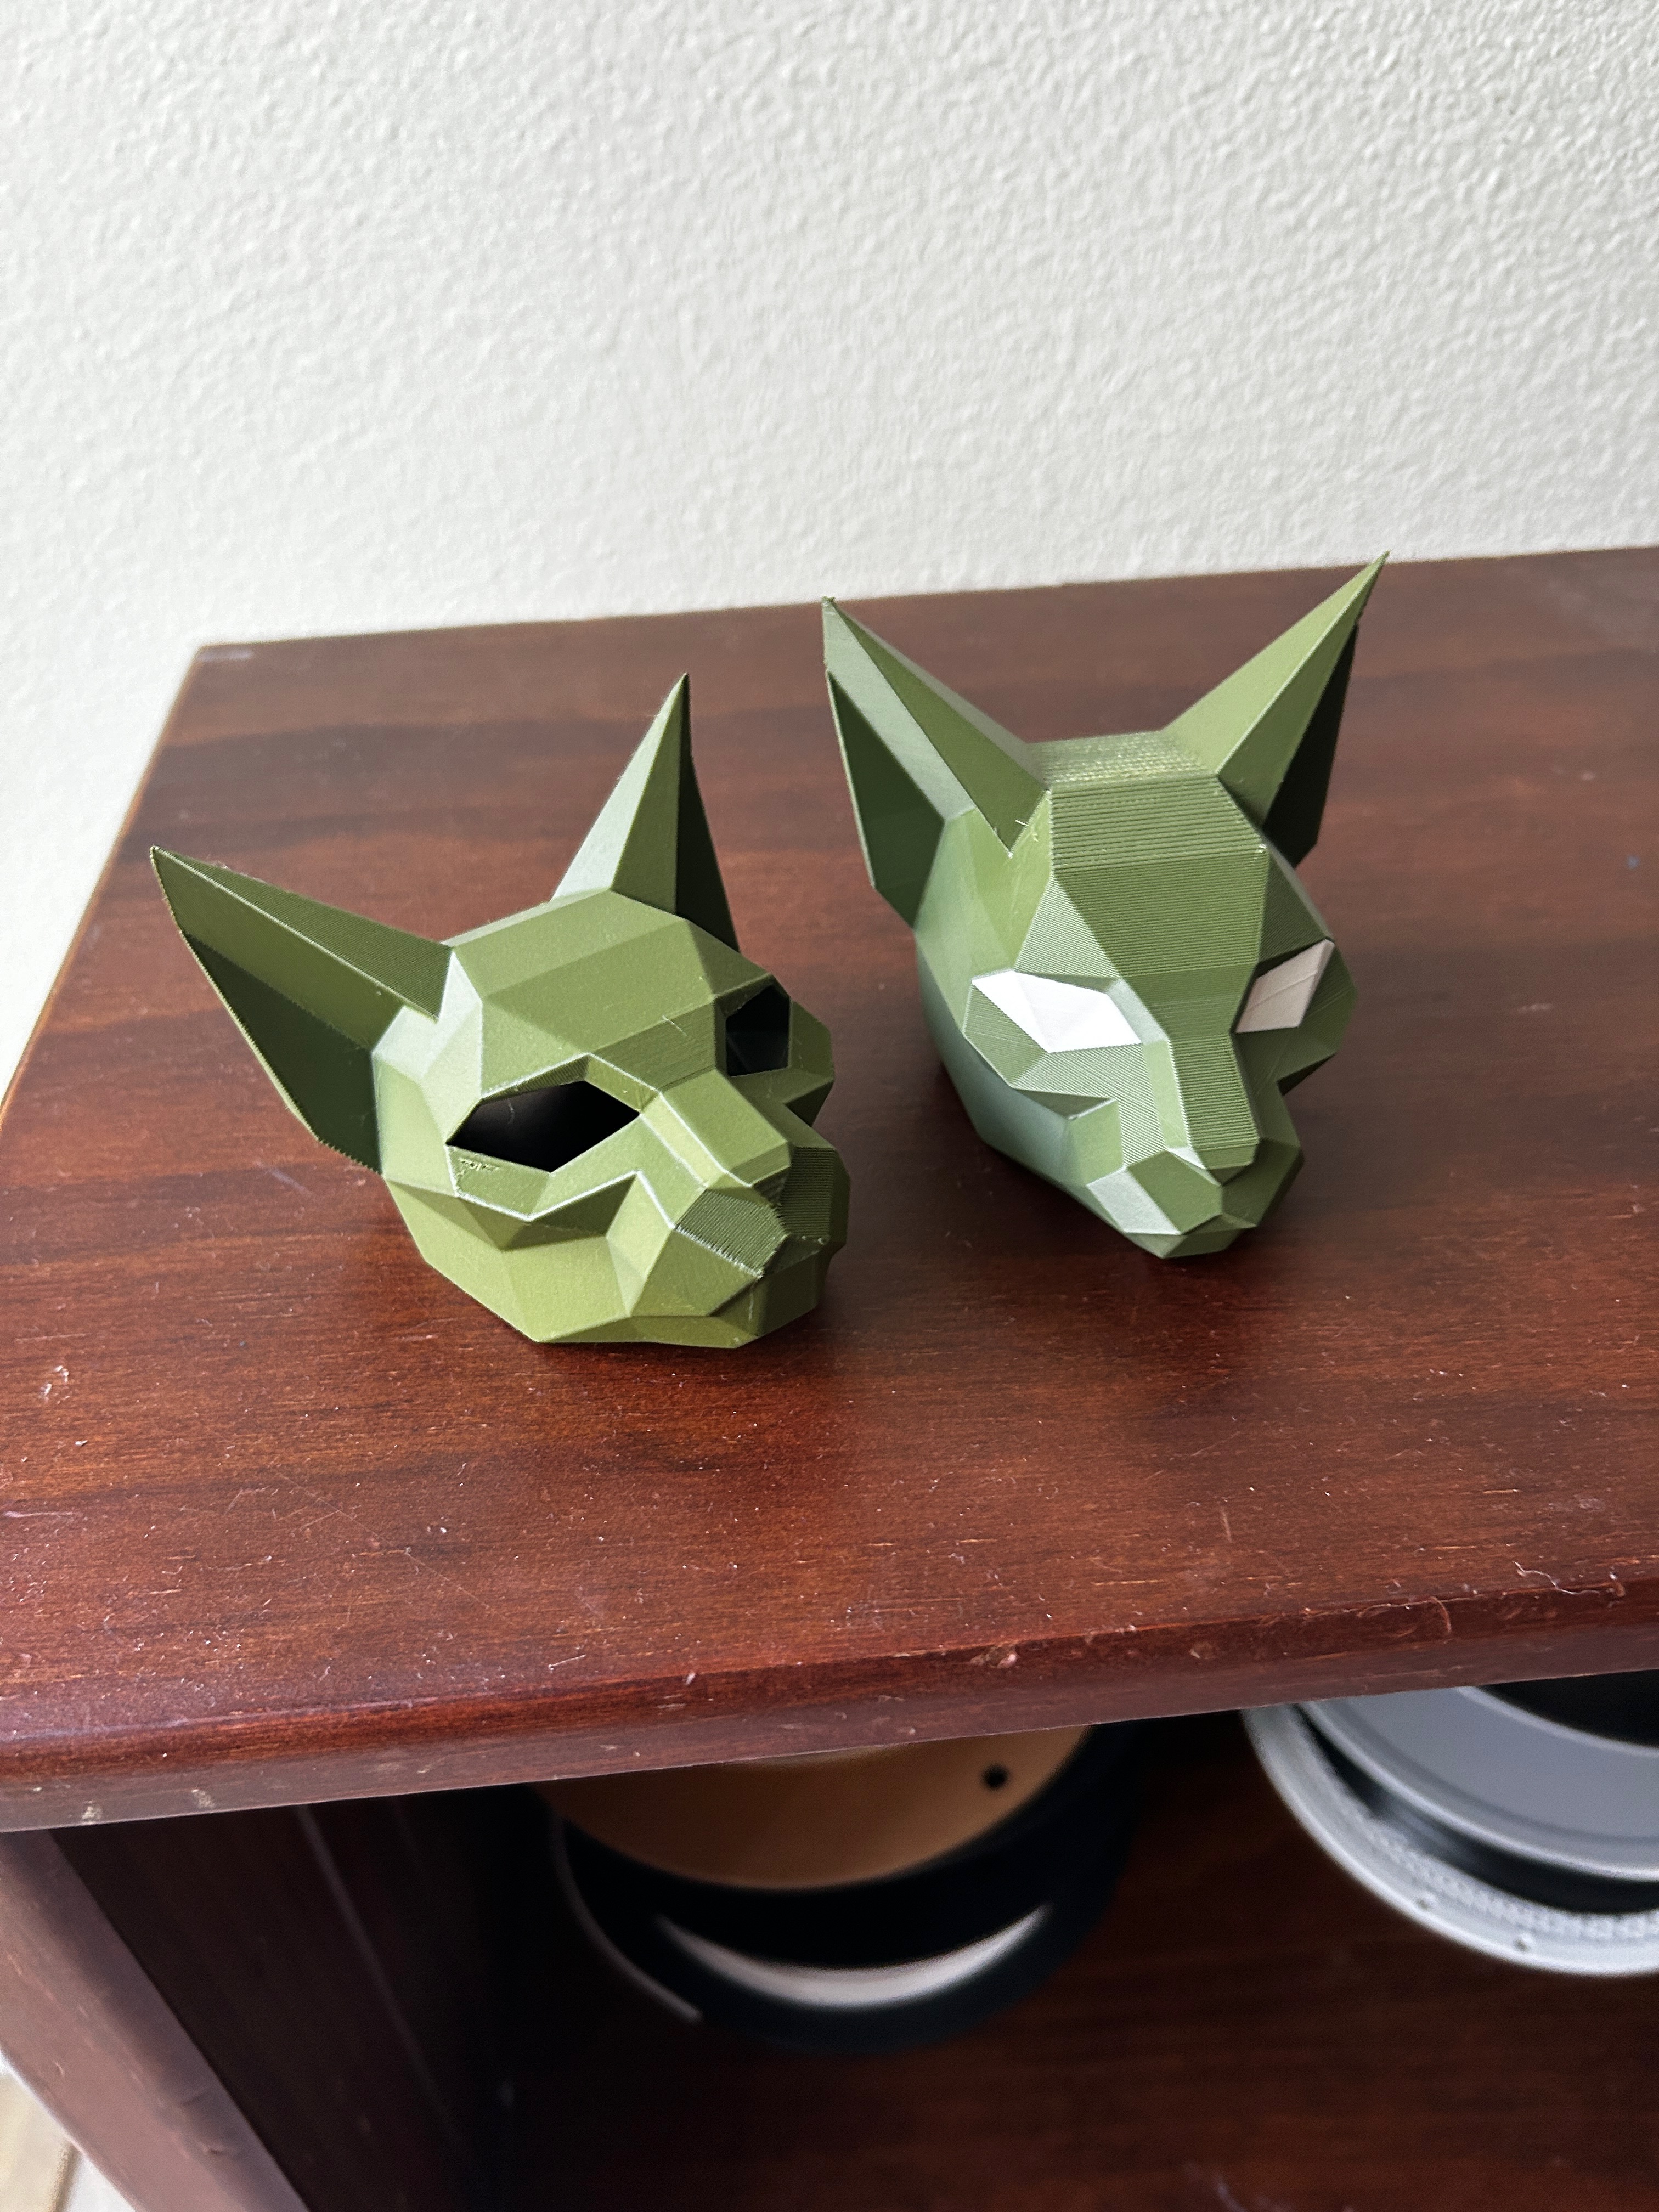
I was absolutely thrilled with the print quality. It was rather refreshing to have a version of this mask that was easy to work with, which was crucial to future development.
Speaking of, here are some of the other ideas for V2 of this mask:
- Adding ventilation to increase wear-time
- Incorporating a voice box to easily communicate with other people
- Designing a back piece to attach the front to
- Adding LED lights to the mask's edges
- Other ideas that I'm probably forgetting at the time of typing this
09.07.2026 - Tony Stark-ification
I got a bit sidetracked with a new idea. I've been thinking a lot about how difficult it can be to communicate with people while wearing the mask. There are many solutions that can address this problem, but the flashiest of them all might involve designing a lifting faceplate, a la Iron Man.

I decided to take a look at some DIY Iron Man helmets with lifting faceplates to try and determine how they worked. Most of them use one or two servo motors with a set of linkages for the lifting mechanism. The shape of the faceplate is very intentional, too. These masks were designed with a widow's peak. This is the area in which the servo motor is placed. The linkages are placed just around the widow's peak. This allows for them to move freely and lift the mask.
I decided to try this for myself with the repaired mesh. I drew some lines, split the mesh by the new path, and thickened both parts of the mask.
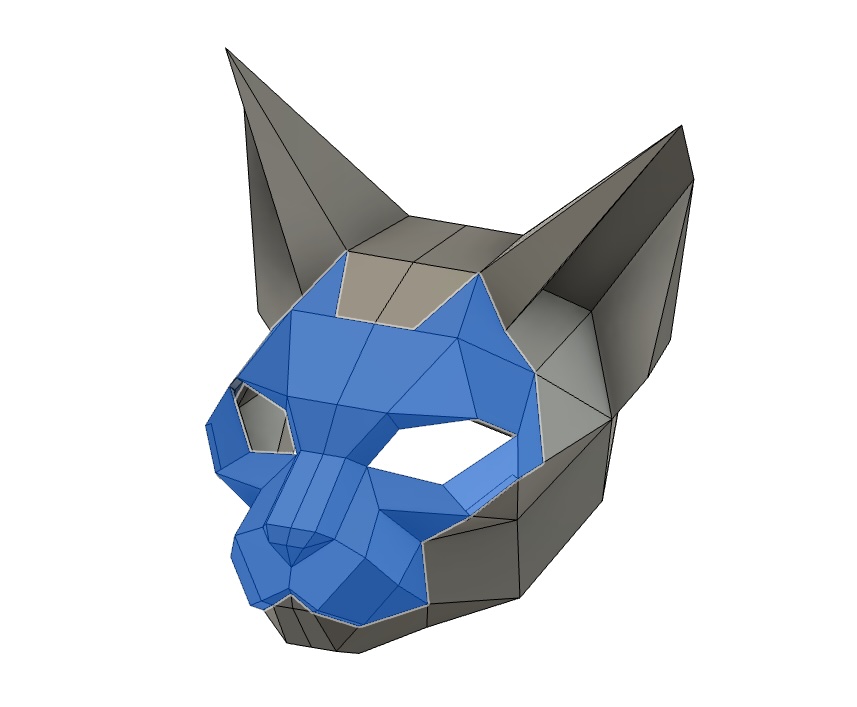
Then, I printed the pieces at roughly 30% scale. After playing around with the shapes a bit, I realized the faceplate was colliding with the ears. I used a Dremel to trim off some of the material. This fixed the issue.
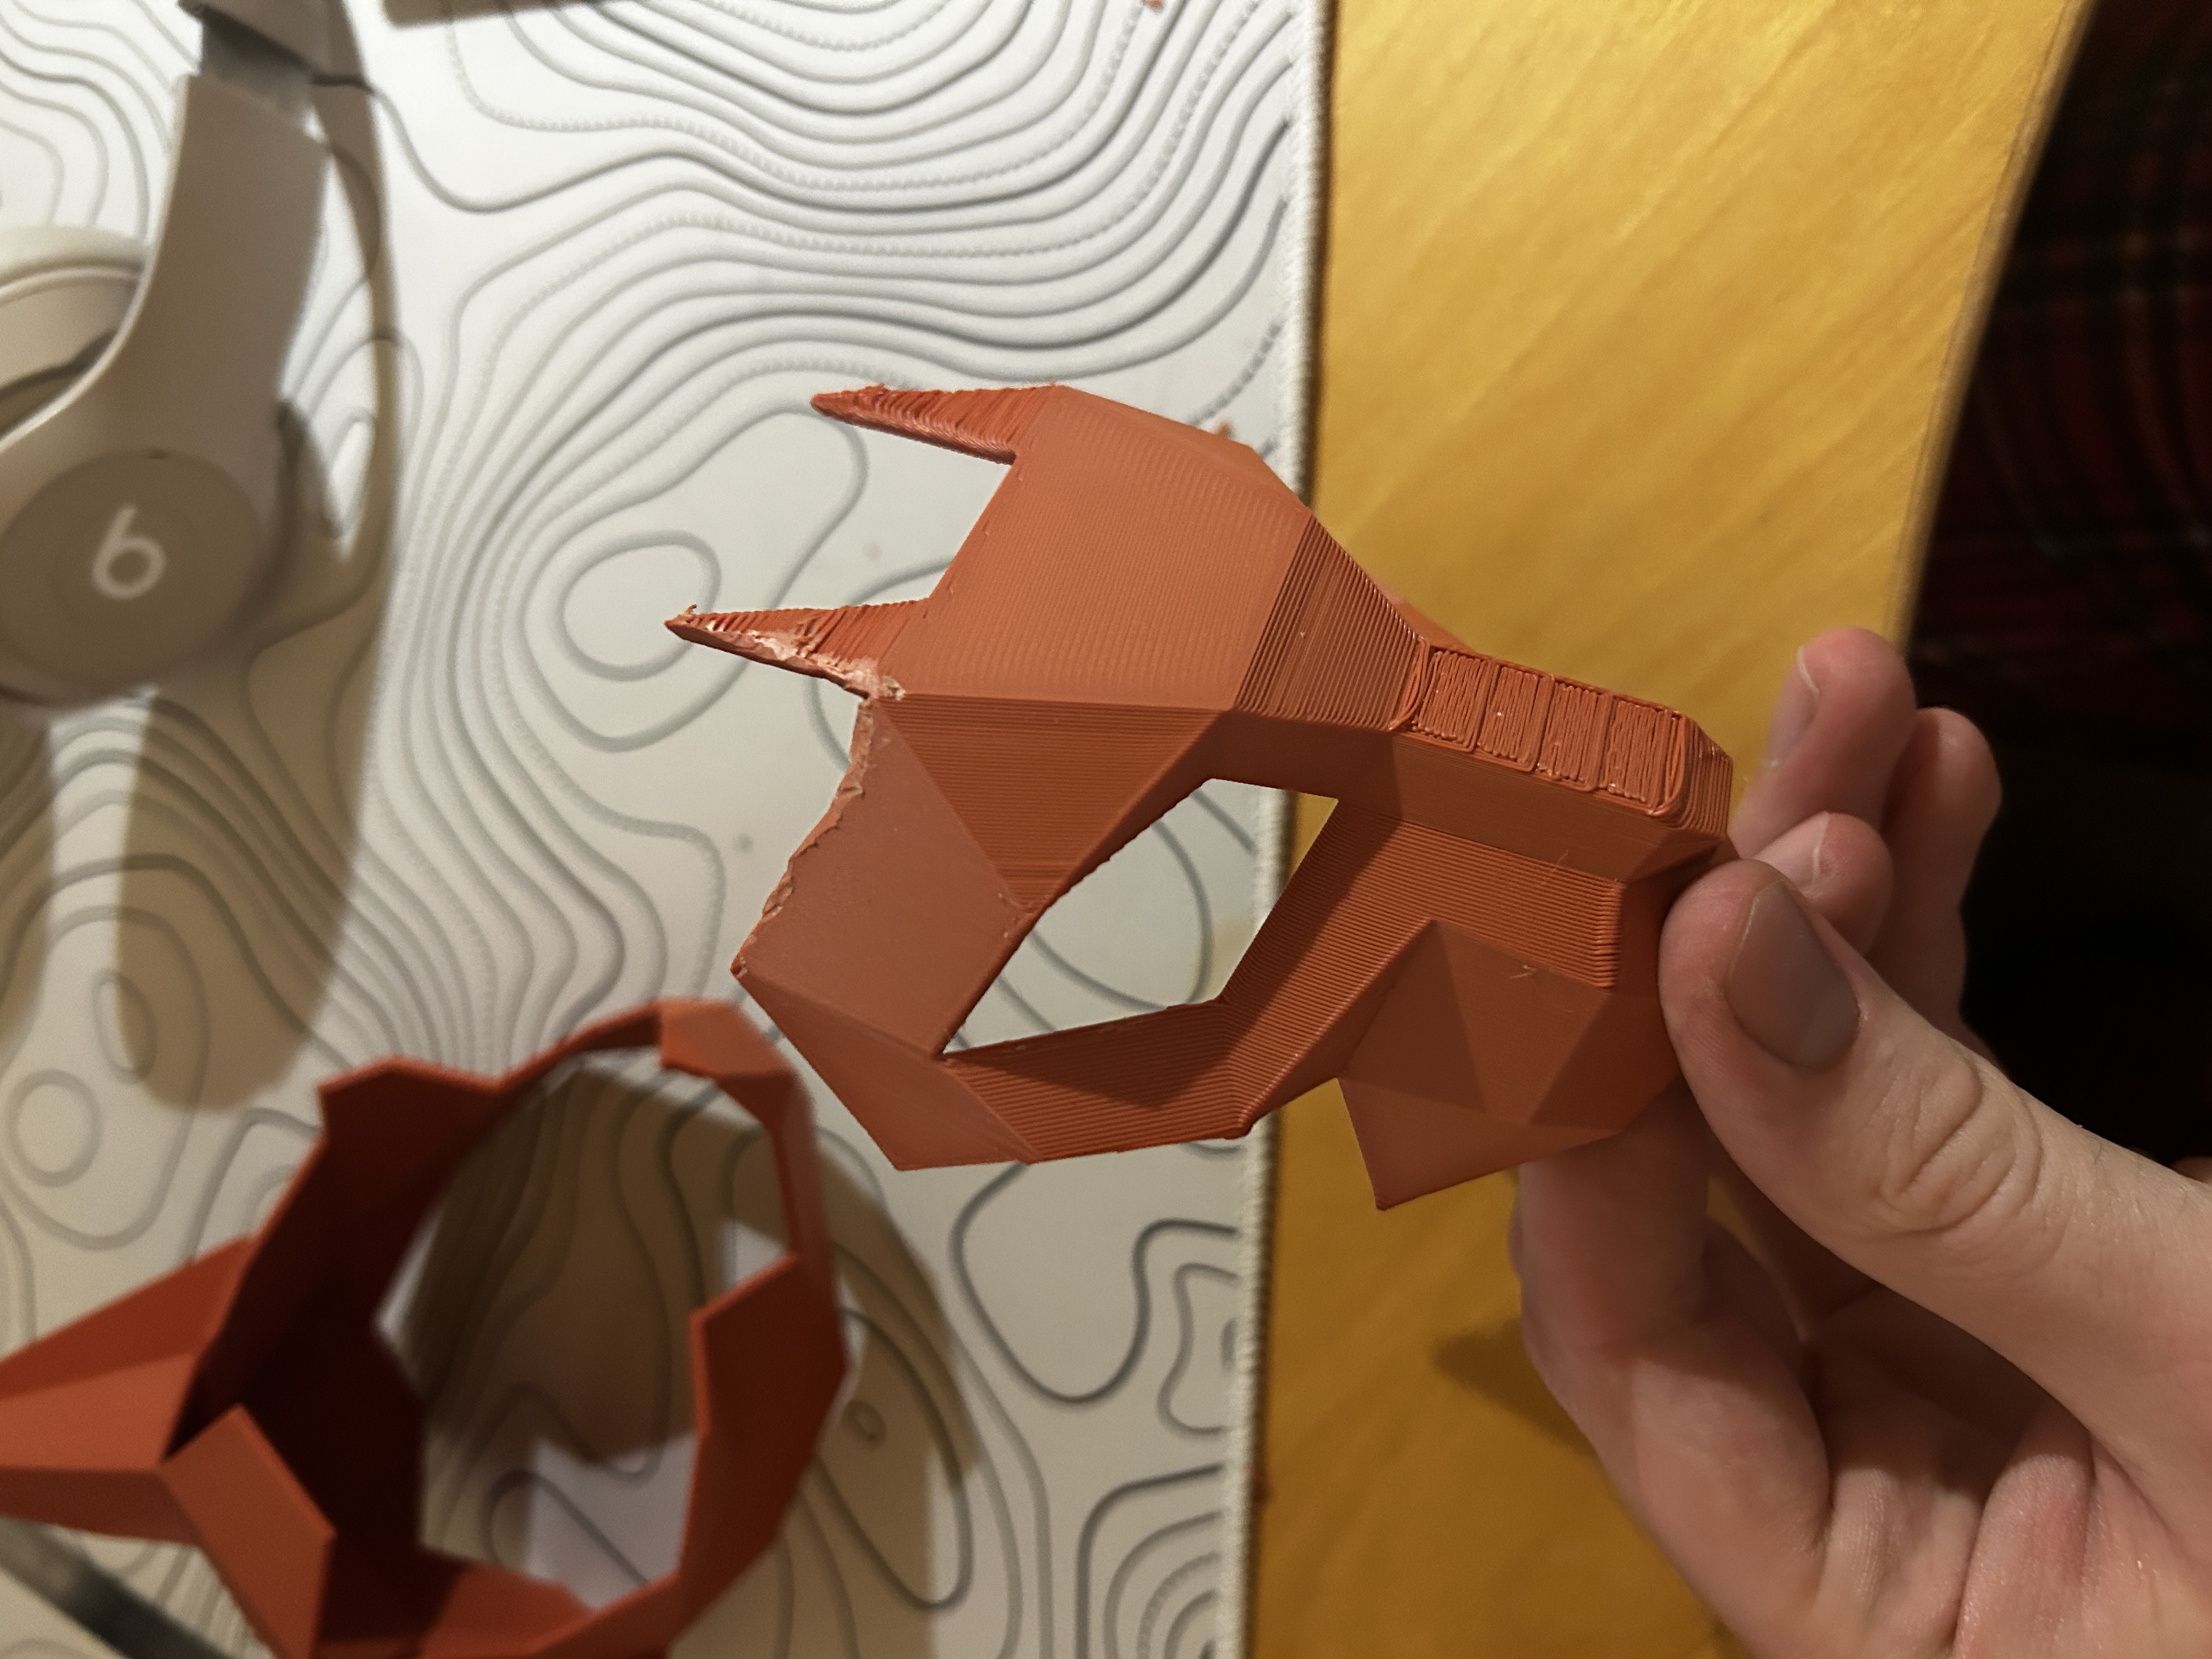
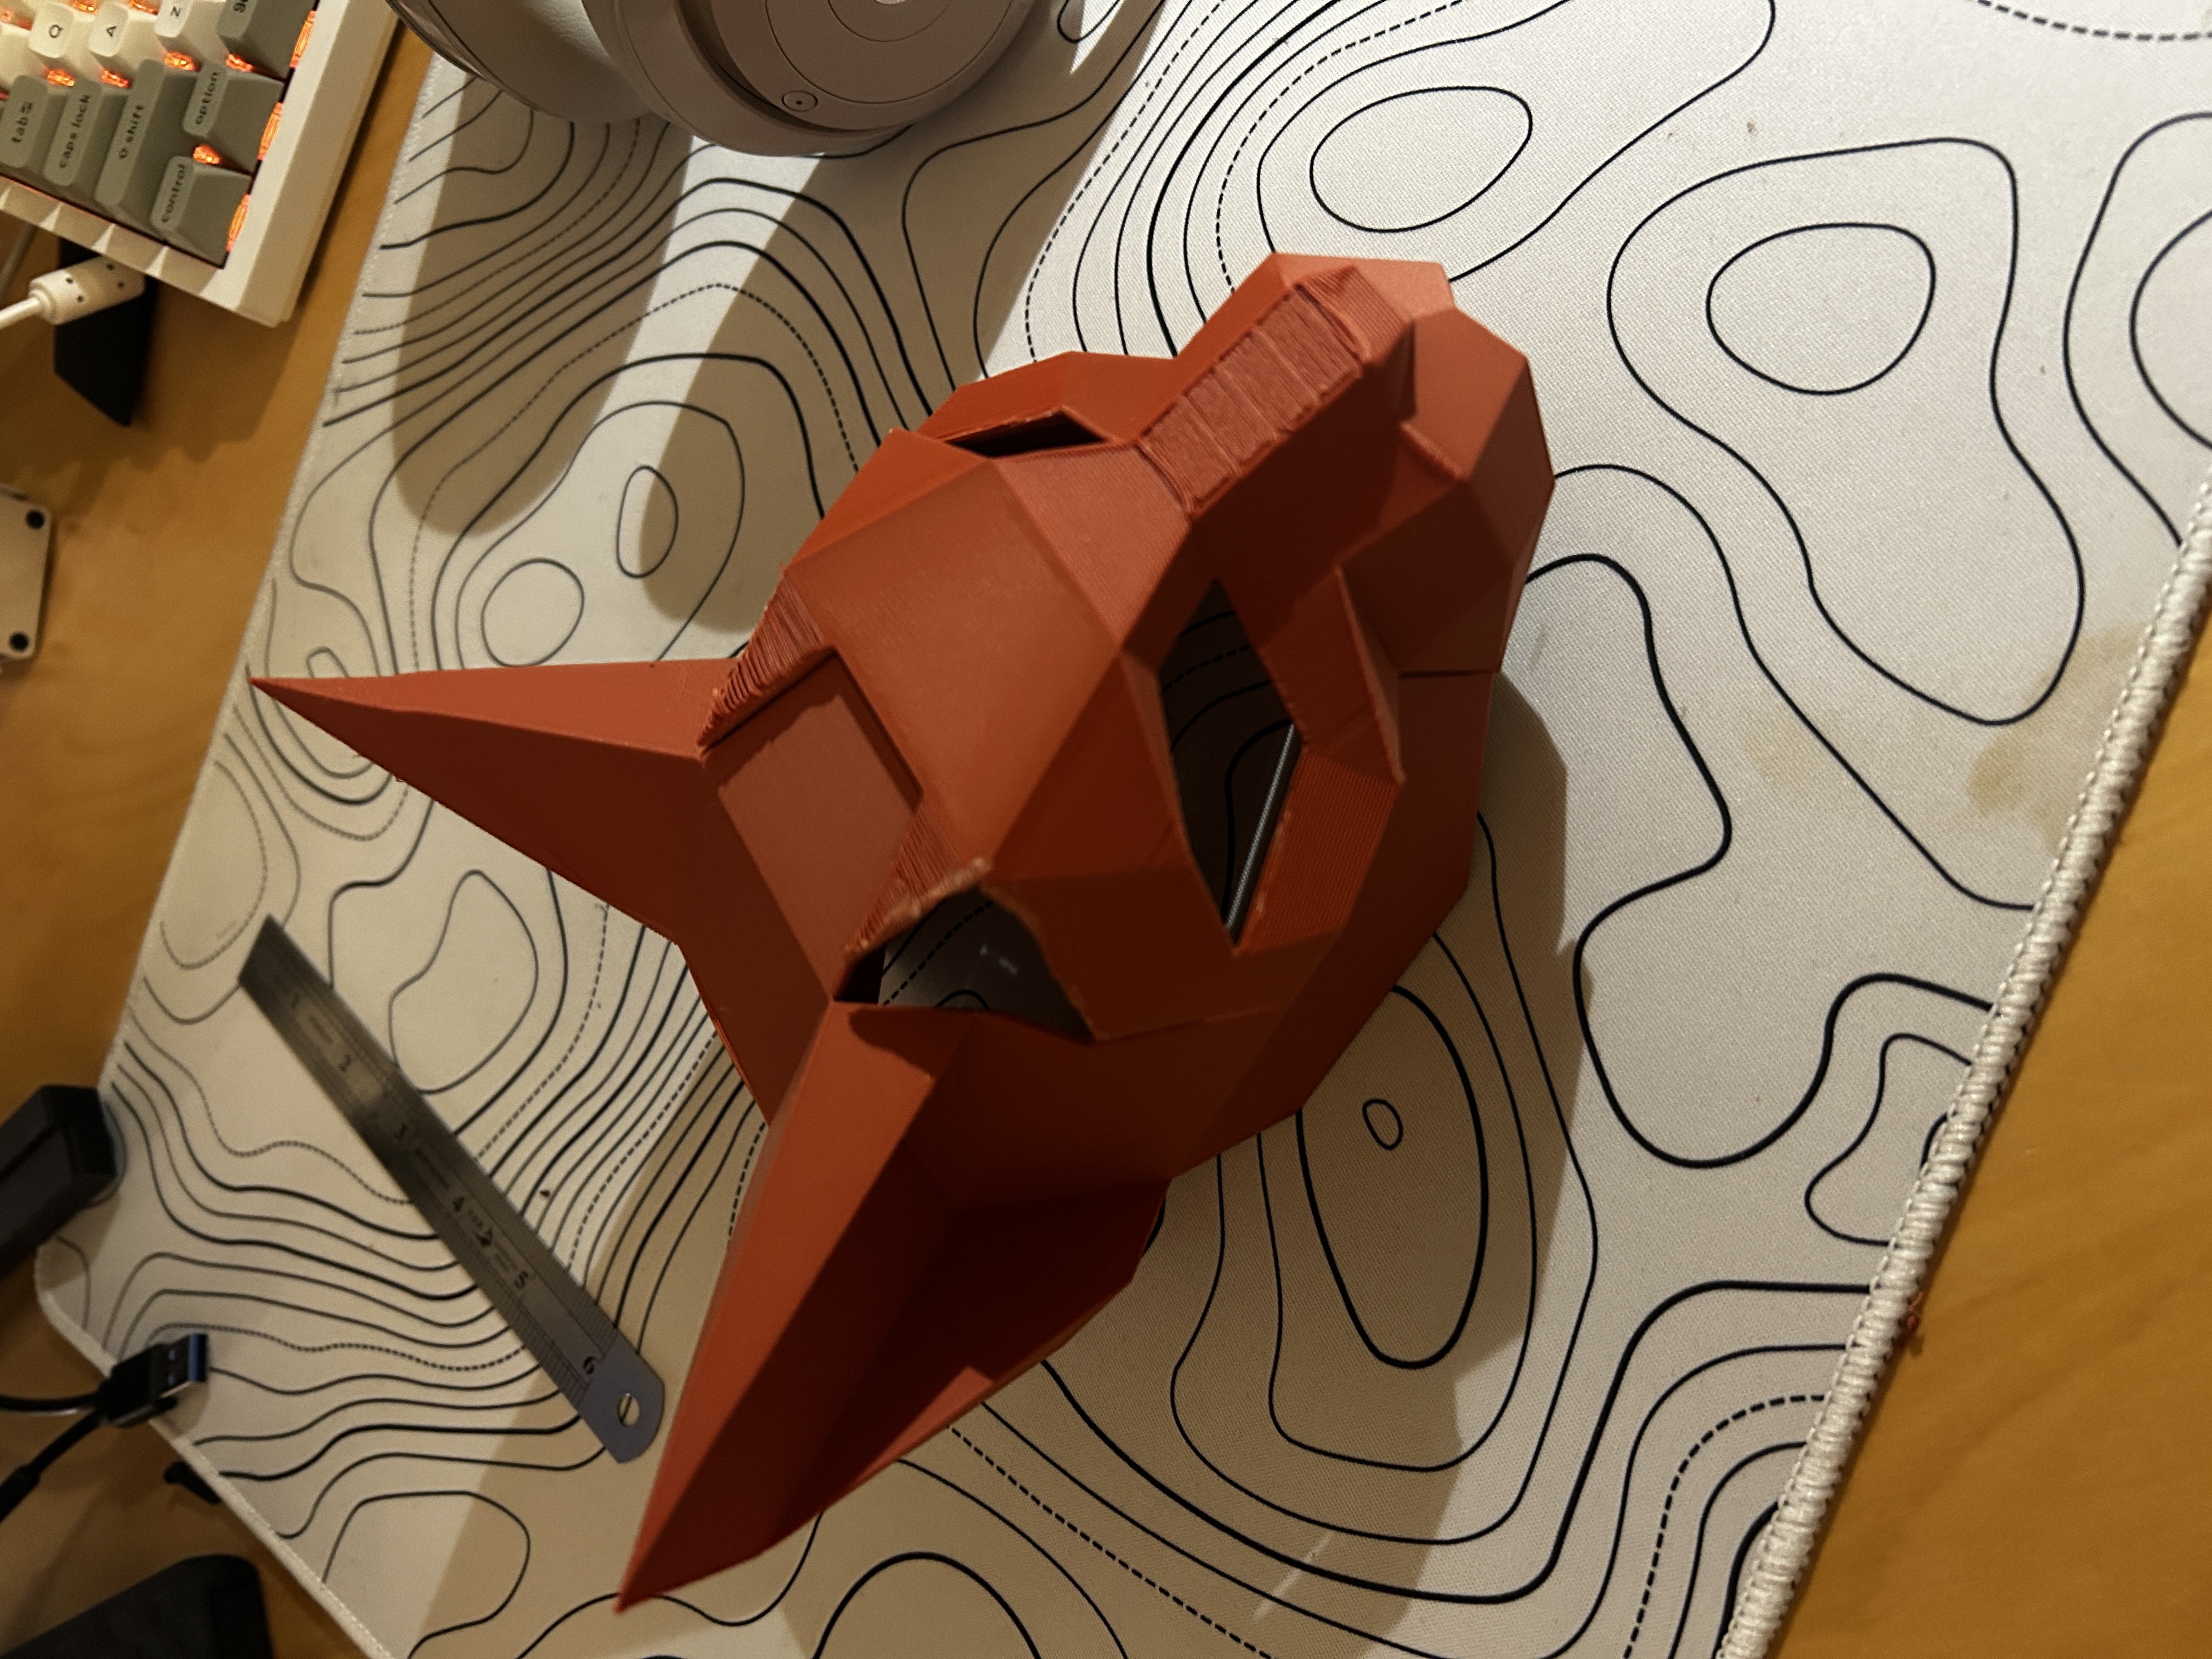
Then, I glued two servo motors in the mask, one in the widow's peak and one in the faceplate. This would allow for control of the lift and additional mask tilt. I printed my own linkage to connect the servos together at the proper length. I wired them both up to an ESP32, along with a button to toggle the faceplate's position.
I generated some test code to tinker with the servo's positions until I found the correct anglesfor both servos in both mask orientations. I then generated some more code to toggle between these configurations with the push of the button.
I was really thrilled with the results.
(video)
I think this would be a really cool direction for the mask, but it comes with a bit of engineering and design overhaul to properly implement. Unfortunately, the spots on the mask where I put the servos rest directly on my forehead, meaning there really isn't any room. I'm going to have to figure out how to either create more space in those areas or be creative with the space I've got. Either way, it's going to take a lot of brainstorming.
Additionally, the pieces I created are not necessarily seam-tight. I will have to figure out how to design the seam between the mask and the faceplate so it fits perfectly.
I'm still not completely convinced on this concept, but I think it's very cool and I hope to explore it some more in the future.